Wednesday 20 December 2017

'Punative Raid' in South Carolina: An American War of Independence Battle Report

I went down to Earlswood Wargamers for an AWI game with Big Al and Spike a couple of weeks ago. I took my camera and here are a few of the photos I took.

Figures belong to Big Al and Spike. Terrain is either Big Al's or club (mostly made by Big Al in the first place).

The game was based around a British punitive raid against a Southern Gentleman who has been supporting the rebels. I took the role of the Hessian Battalion commander, while Big Al played the Brits. Spike was the hastily assembled militias trying to defend the Southern Gent's plantation.

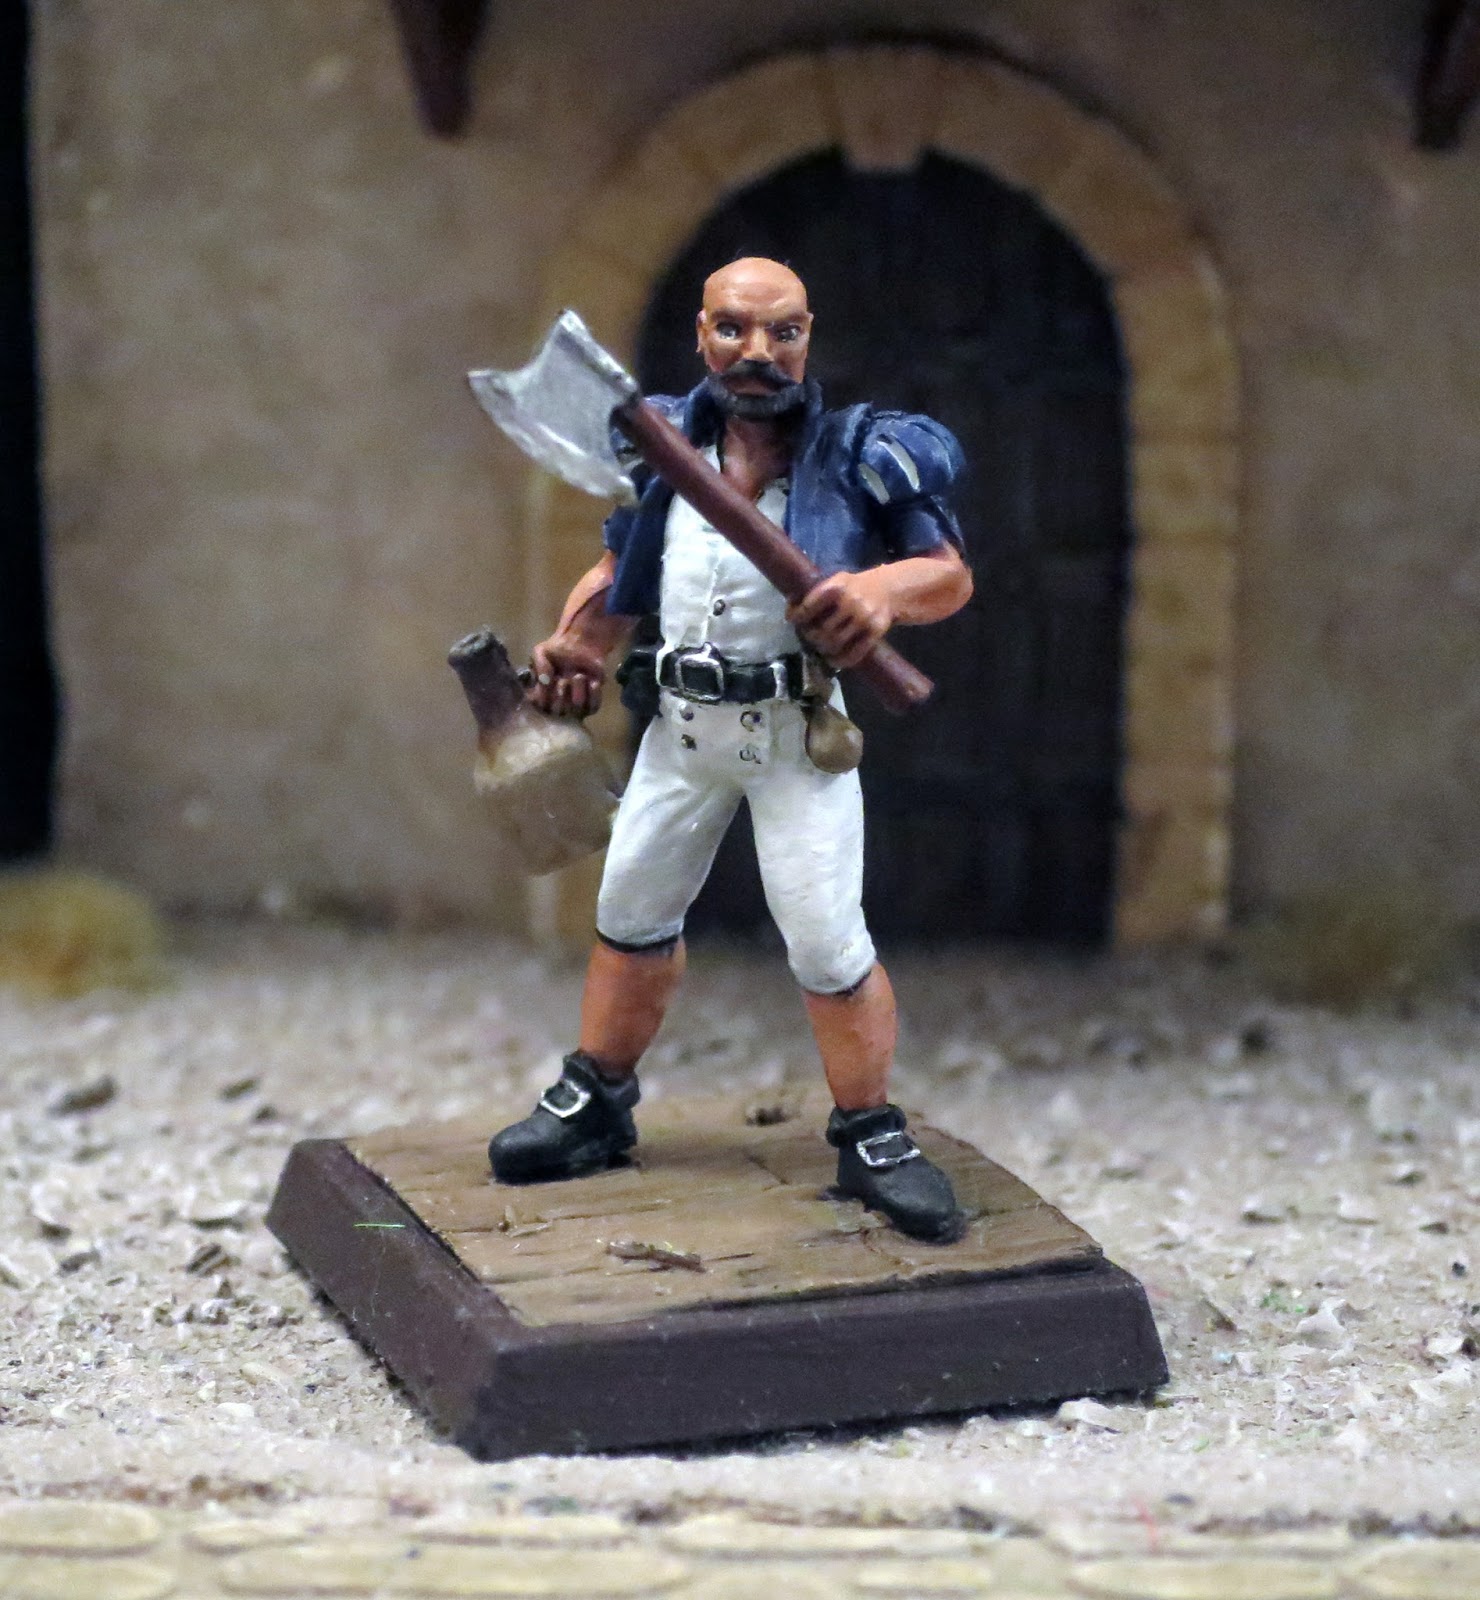
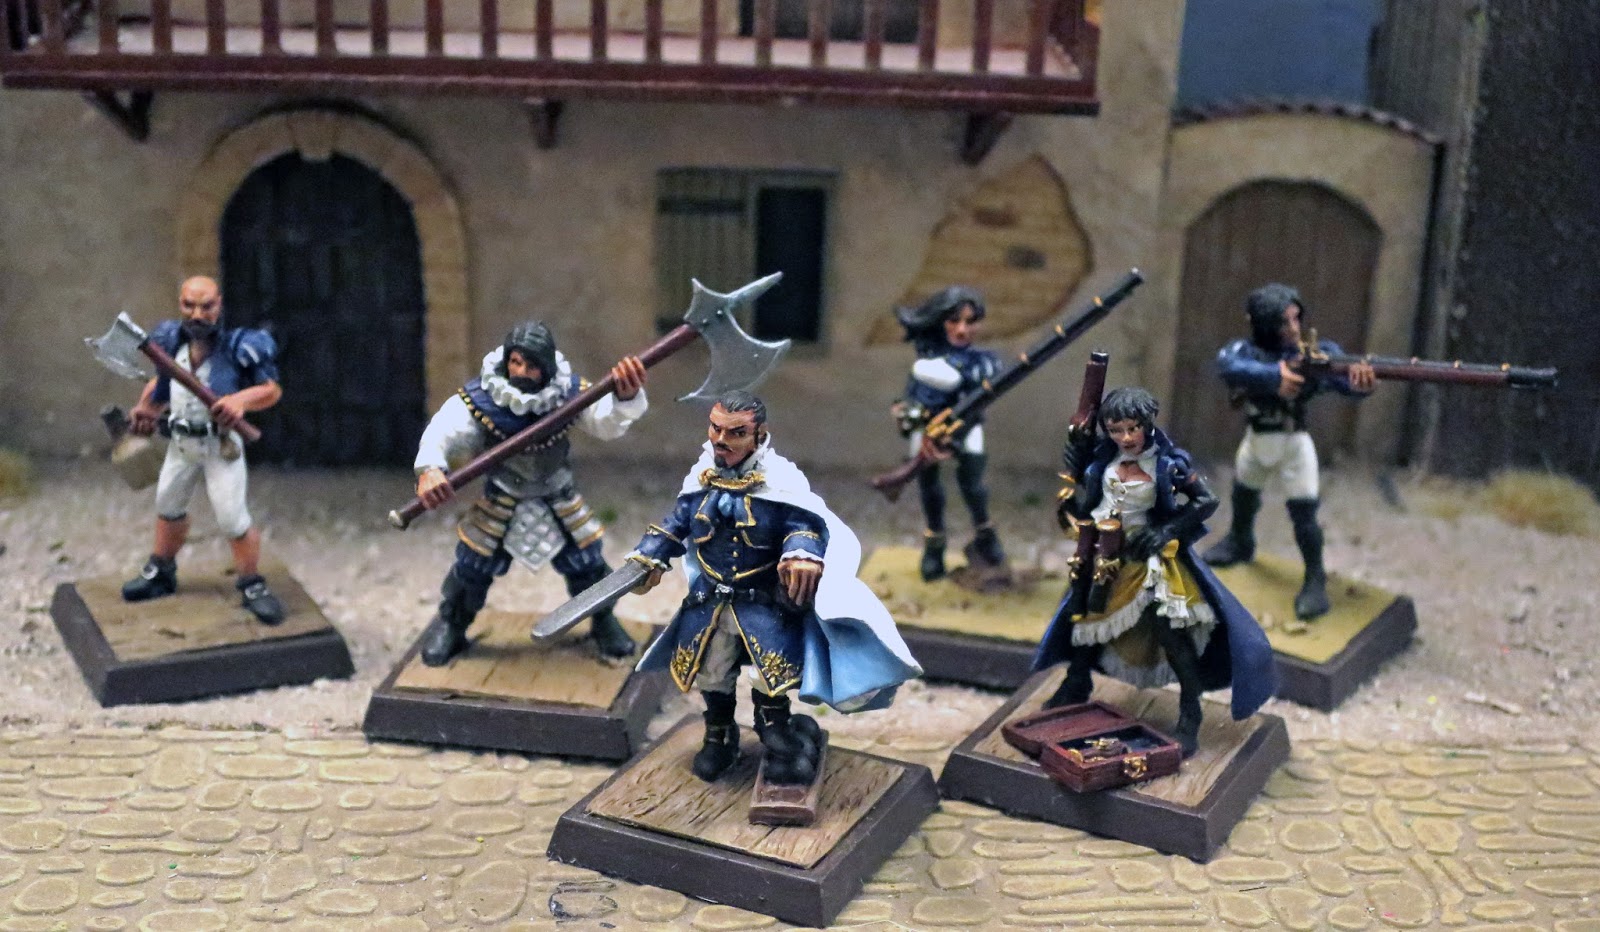
A southern Gentleman leading the local militia.

The Plantation


Southern Militia ready to fight to protect their homes (well the southern gentleman's home anyway)


The Hessians arrive on one flank...


lead by their brave commander (Me!)...


With a small force of Jagers.


South Carolina Woodsmen are the plantations first line of defence


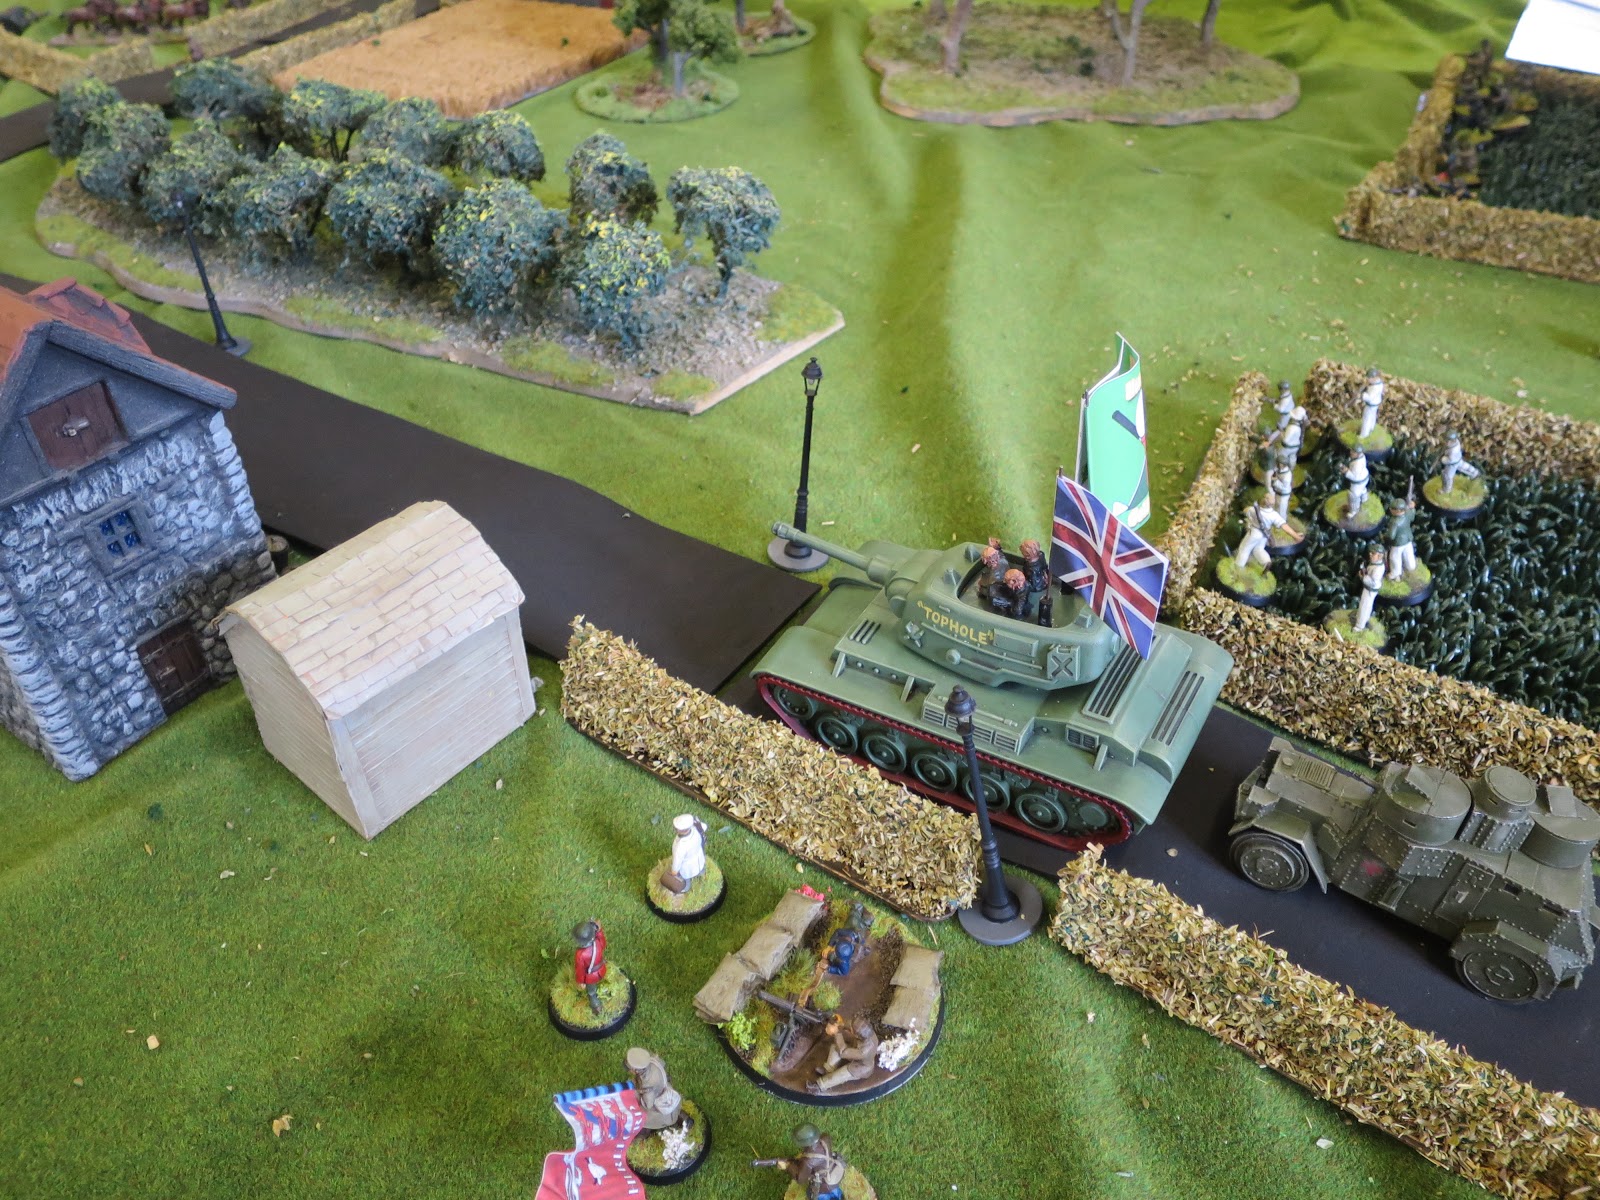
Elsewhere on the battle field the Brits advance is hampered by the retain and the harassment of the Southern rebels skirmishers
  

The Hessians advance in lines over the fields, ignoring the skirmishers sent to slow them down. I held my nerve and kept on advancing, resisting the urge to start exchanging fire with skirmishers dug in behind cover.


The Brits advance strait into the waiting 6pdr cannon set up on the road ahead.


The Hessians scatter the skirmishers and advance on the big house. They exchange fire at short range with the militia, and then the grenadiers charge in.


The militia break before the grenadiers charge. The southern Gent tries to rally them


But its not going to stop the grenadiers ransacking the big house, then putting it to the torch.


All in all a great game, on lovely terrain with beautiful figures. Thanks to Big Al and Spike for letting me join in.

Sunday 17 December 2017

Freebooter's Fate Scrap

Following my declaration to post regularly to my blog I have had technical problems with my computer that has taken two weeks to resolve (my hard drive packed in and have had to start from scratch!). However, with that behind me I can get back to blogging with what I hope will be a rapid flurry of blog entries.
 
Without further ado, here are some pictures of a game of Freebooter's Fate Pulp Citizen and I had a few weeks ago round in his man-cave. The scrap was the first outing for My Imperial Armada, fighting to rid the island of the terrible scourge of the Brotherhood, a band of cowardly assassins.


My brave boys (and girls) of the Imperial Armada...
 
 
Pulp Citizens cowardly masked assassins of the Brotherhood...
 
 
The scrap got of to an early start with my gunners taking up position to provide covering fire
 

 Pulp Citizens crew continued to sculk about in the shadows
 
 
By using my captain as bate I managed to draw the  assassins out of the shadows as they tried to take advantage of my 'tactical error'. My captain survived their attacks and the heavy hiters from his crew counter charged and cut the assassins down.


 My marine chassed after on of the assassins henchmen, but came of worse in the fight.  


With time running out the cowardly assassins proved reluctant to risk crossing open ground where my gunners could snipe at them, and other than them  chucking a few poisoned knives at my men, the fight was pretty much over.


All in all a great game, and a satisfying first outing for the Armada. They combine good ranged attacks with reasonable close combat ability and great morale.

Saturday 11 November 2017

Freebooter's Fate: The Imperial Armada Crew

Just because I wanted to post something this weekend, I had a look through my shelves at some figures I painted during the last twelve months that I never posted on the blog. I found some Freebooters Fate figures I bought at Salute 2017 to show off. I apologise for the bad lighting but there was no natural daylight around when I took these pictures. 


Sunday 5 November 2017

VBCW Battle Report: Chaos in Herefordshire!

This week saw an epic battle take place in the hills and valleys of Herefordshire as a group of VBCW enthusiast gathered to fight out another Big Game. 

For fun, the organisers Roo and Clive, came up with a mad cap scheme where the three senior commanders (Socialist, Royalist and Anglican League) each had money and resources to try to attract the 'neutral' LDV (Local Defence Volunteers) to their respective causes. The game began with frantic attempts by the three senior commanders (I was the Socialist commander) to attract the support of the LDV. I only managed to get the support of one LDV (Roo) but I was very pleased because I knew Roos LDV had a 17pdr field gun, which I was confident would come in jolly handy. The Anglicans had two LDV in support, and the Royalists also had two. 


Now while my force was nominally a Socialist force it has, since the last battle, taken on a more left wing tone as the leadership of the Red forces in Herefordshire has been infiltrated by the Communist Party of Great Britain. It is now not unusual to see CPGB Commissars in Socialist platoons, ensuring that the troops and officers are 'thinking correctly'. My commanding officer is Professor Winters, who commanded a Socialist company at the Second Battle of Ledbury. During that battle the Winters' force was allied to the much larger Anglican League force. The collapse of the Anglican defence of Ledbury left Winters' forces encircled by BUF and Royalists, and Winters' entire company was wiped out or captured. Winters himself only managed to escape by hiding under a bridge. After the battle he fled to Birmingham but the Socialist Council found him guilty of incompetence, and he was arrested and detained in Aston Hall. He later escaped with the help of agents of the CPGB, who used their influence to help him get promoted to senior commanding officer for the Red forces in Herefordshire. 

Captain-Commissar Professor Winters briefs members of the CPGB prior to the battle 
For historic reasons the Anglicans and the Socialists in Herefordshire had an alliance against the Royalist/Fascist Government forces, so we began the game together, opposed to the Royalist forces. Due to a shortage of manpower on the Royalist side the Socialists found that their two companies were opposed by a single company of the North Herefordshire Volunteer Militia, ably supported by Royalist Tank commander Sir Alan MacGuffin. The three companies the Anglican League were on the other flank, matched against two Royaist companies. 

Sir Alan MacGuffin's tank leads the North Herefordshire Volunteer Militia in their attack. 

As we position our forces to sweep across the flank and wipe out the North Herefordshire Volunteers, MacGuffin's tank trundled up the road, leading the Royalist advance.  My anti tank team, from the Wolverhampton Steel Workers Militia, raced towards the lumbering metal beast in their tiny car, before piling out ready to assault it. 'Anti-tank' team is something of a bold title for what really equates to two guys with a crow bar and a hand grenade. Somehow these plucky Reds managed to clamber on top of the Royalist tank, prize open a hatch and lob a grenade in. Sir Alan's butler (gunner) and Chauffeur (tank driver) were killed in the blast. A dazed MacGuffin clambered out of the smoking tank and was promptly captured by the Reds. 

Red Anti-tank unit disables the Royaist tank and capture Sir Alan

What happened next was a surprise to everyone (well almost everyone). With the Royalist MacGuffin captured, the proletariat of the North Herefordshire Volunteers decided to throw off the chains of their aristocratic masters and raise the Red Flag.  CPGB infiltrates and anti-royalist propaganda had persuaded the LDV commanders to turn on their royalist masters. (Basically Craig, the LDV player, had randomly drawn a order that he was to betray his Royalist paymaster at some point during the battle, and naturally MacGuffin's arrest seemed like a good time). The North Hereforshire Volunteers had a unit of Bee Keepers Militia, who were in the woods with the Royal Navy and Royal Marines, covering the open ground in the middle of the battle field. Upon seeing the Red Flag they turned on the sailors and opened fire at close range...chaos and carnage ensued. 

A Republican Air Force Hawker Fury circles overhead waiting for a target
Roo's 17 pdr now re-positioned ominously pointing at the Anglican League

With our flank secure (well there was no one to fight as all three of us were 'Reds') Professor Winters decided it was time that the alliance between the socialist and the Anglican League was brought to an end. While the North Herefordshire Volunteers engaged the Royalist force in the woods, the rest of the Reds advanced on the Anglican Leagues positions. The Anglicans held a small field surrounded by dry stone walls- a good defensive position- and one we would have to take if we would stand a chance of breaking their Anglican forces. 


Professor Winters called in the Republican Air Force to strafe the position (alas the Hawker Fury was shot down), and Roos field gun pounded the Anglican's position relentlessly. Under the cover of this barrage the Reds advanced towards the Anglican's defences. 

The Hawker Fury strafes the Anglican League position in the stone walled field


The fury is damaged by the Anglican League and crash lands. 
At this point another unexpected occurrence changed the dynamics of the battle, as the Anglican League and the Royalist decided to declare a temporary truce while they dealt with the 'Bolshevik Scourge'. Both of them were happy to have the workers fight and die in their armies but the idea of the proletariat rising up and seizing power was enough to terrify them both into co-operating to protect their vested interests. 

Anglican League forces abandon their attacks on the Royalist and turn their attention to their former allies
As Craig's Militia pushed unit after unit into the woods, and the Royalists did the same, the entire woodland became a meat grinder, where neither side could achieve a significant break through and the loss of life was terrible. The commanding officer and senior NCO of the North Herefordshire Volunteers was killed leading his men in an assault on the Royalist positions, as was a CPGB Commissar Winters sent to assume command of the LDV. The Royalist Officer, Captain Giles, was also wounded, but only lightly, and is likely to make a full recovery. 

The Anglican Bishop negotiates a truce with the Royalists
As Roo and my forces advanced on the Anglicans defences we found our armoured cars could make little progress over the boggy fields, and so out infantry were unsupported by armour. The infantry- two full companies- advanced across an open field, onto the Anglican held positions, braving machine gun fire as they advanced. Winters' company suffered terrible losses, but were able to wipe out the Anglican infantry defending the stone walled field, and although they were a spent force they had  cleared the way for Roo to advance. An Anglican League officer was killed by a lucky shot from Roos 17pdr field gun, which was a blow to the Anglicans. Despite this loss they did manage to advance another company up to try to push Roos forces back, but it looked like too little too late.

Socialist forces advance stoic towards the Anglican defences

The Anglicans defened the stone walled fields to the last man

The battle concluded with a hallow victory for the Reds. Craig and my forces had lost almost all their infantry, and Craig had lost an officer to boot. The Royalists had lost the best part of a company in the meat grinder of the woods, and the Anglicans had lost another company, and an officer, to the combined attack of Roo and myself. 

What is, perhaps, more important, is the repercussions for the future of the VBCW in Herefordshire. Winters' personal vendetta against the Anglicans, who he blamed for his losses in the Second Battle of Ledbury, has shattered the alliance between the Reds and the Anglicans, which can only strengthen the Royalist/Fascist power in the area.  Perhaps the temporary truce between the Anglicans and the Royalist might turn into a more permanent political arrangement?


Craig winning the Umpires Award for being a treacherous backstabbing rogue!


As a parting thought I would leave you with this to think over: Did the communist Party of Great Britain know that Winters would turn on the Anglicans? Did they plan to use Winters' hatred of the Anglicans to break the alliance between the Anglicans and the Socialists? Was this why they made so much effort to free Winters from his imprisonment and secure his position as senor officer in charge of the Socialist forces in Herefordshire? It certainly makes you wonder...


Friday 3 November 2017

Scouse Cossacks for Very British Civil War

November will see me travelling to Herefordshire to participate in another 1938: A Very British Civil War (VBCW) "Big Game". I will be playing the commander of the Red forces. This game will see the return of Professor Winters (Hoping to make up for his disgraceful conduct in the Second Battle of Ledbury). 

Winters has now fallen in with the Herefordshire Communist Party, and has now ingratiated himself with the local commanders and managed to get the rank of Captain-Commissar. This game will be a little different to the usual VBCW big game as most of the players will begin the game unaligned to either the Reds or Government forces, and must be persuaded, bribed, bullied etc into joining one side or the other. this might lead to uneven battles, but will certainly be fun. 


Prof Winters, resplendent in the uniform of a CPGB Captain-Commissar (with lots of added medel bling which I doubt he really earned)


Winters and his CPGB Bodyguards

To mark the battle I have painted up a new unit for my Reds. These are from the 1st Aintree Light Horse Regiment. This is a horse-cavalry unit from the Liverpool Free State. They are primarily a light reconnaissance unit, and these tough soldiers often operate behind enemy lines for prolonged periods. They are encouraged to live off the land, which is where they eared the nick name 'Aintree Light-fingered Horsemen'. 


Aintree Light Horse mounted for a patrol

They are trained to fire from a mounted position, and in skirmished are likely to adopt this tactic, however they are not equipped or trained to fight in melee as cavalry, and in larger engagements will dismount and fight as regular infantry. Their light role means that they lack a LMG, but are equipped with hand grenades to make up for this shortcoming. 


Aintree Light Horse dismounted for serious fighting. 

The Aintree Light Horse have adopted a grey fur hat as their unofficial uniform. This has lead to their other nickname: The Scouse Cossacks. 

Tuesday 31 October 2017

Zombtober 2017 Finale: 15MM Mordhiem Warband!

Happy Halloween folks. 

I hope you are having a ghoulishly good time. Yet again Zombtober has drawn to an end in a flurry of rotting flesh and undead gore. And what a zombtober it has been! It has been great to follow everyone's blogs and see how their zombie hordes (and survivors...lots of bloggers did survivors this year) have blossomed. The world of wargaming is now a considerably deadlier place. 
My humble efforts have seen me complete an undead warband for my 15mm Mordhelm project. Three zombies, four ghouls, three dregs, a necromancer and a vampire have all made it off my work bench. 

Today I have completed the Vampire Thrall who will be leading my warband. This is Ivan von Drak, an agent of the von Carstein family, whose business in the ruins of the cursed city of Mordheim is dark and mysterious. 


And here is Ivan von Drak with his warband (minus one zombie who is still waiting to have his base re-done after his little accident).


Sunday 29 October 2017

15mm Zombtober Ghouls

OK, not actually zeds, but close enough. These are four ghouls for my 15mm Modhiem undead warband. These miniatures are by Oddzial Osmy, and are very nicely cast and sculpted. Ghouls in Mordhiem are a rank and file troops type that serve their dark masters in return for a chance to engage in a bit of cannibalism. They are faster than the shambling zombies, but are not as tough. I also plan to get some more of these to use as ghouls for my 15mm Vampire Counts Warhammer army. 


In addition to the ghouls I have managed to repair one of the Dregs whose sword snapped off while I was painting it. This is unusual for a Demonworld figure are they are normally surprisingly durable. Anyway, I filed off the sword hilt and added a brass spear I had left over from my English Civil War pike-men. I also added a shield off a skeleton warrior (also from Demon world). This Dreg is Vlad "the Impaler".

Tuesday 24 October 2017

15mm Chain of Command Battle Report

I managed to get a game in with Vlad at the Earlswood Wargamers last week. We played Chain of Command, using Vlad's 15mm scale figures. I played an american rifle platoon supported by a couple of M5 Light tanks, and Vlad played panzergrenadiers. 

For this game we plated on a 6x4 table and kept all ranges etc the same as they are in the 28mm scale game. this gave the game a different feel than using 28mm figures, as the perspective was altered to make the battle field feel much more open. it has other advantages to, as vlad was able to offer a vast choice of support options for me to choose from, from Shermans to M10s, to artillery and antitank guns. the low cost of 15mm tanks compared to 28mm scale means that you can pick and choose freely, so each battle will be quite different. 

Vlad's scenery was lovely too, and this was the first outing of Vlad's complete set. 

We played a strait forward meeting engagement, with my infantry platoon advancing up a lane in Normandy, and running into the Germans coming the opposite way. 

Here are some photos...


An M5 Light tanks moves rapidly up the lane, scouting out potential German positions...


 Sneaky Panzergrenadiers emerge form a french farm house ready to sping an ambush. 


Having spotted movement in a ruined farmhouse the Yanks deploy along the hedgerow. 


German MG's pin the Yankee gun team in place while a squad of Panzergrenadiers assaults their position breaking their moral and driving them off.  


A German NCO directs fire from the ruined farm house...


The lead M5 uses its co-ax MG to rake the Panzergrenadiers behind the hedge. But what is this coming around the corner of the lane?


A German Panzer IV comes in to view and opens up on the M5....the plucky little tank is damaged but continues to rake the German infantry with MG fire. 


The American GI's move up to support the tanks, one team throws smoke to try to protect the M5 from the Panzer IV.


One of the American GI sections breaks under sustained fire from the Germans. 


The M5 was eventually knocked out by Panzerfaust, having survived two shots from the Panzer IV and a Panzershreck from the Panzergenadiers command section. 

This battle ended in a victory for the Americans...but only just. The American force was down to one force moral when the loss of a junior officer drove the Panzergenadiers force moral to zero...you couldn't get a close fought battle.