The whole process was very simple, requiring very little modeling/DIY skills. The only equipment needed is a good craft knife with a fresh blade, some 5mm foam centered card, some mounting card, some PVA Glue, a couple of elastic bands and a printer (preferably someone else- this keeps the cost down even more).
Step One
Print the image off. There are lots of web sites catering for the trains and wargaming enthusiast, and some even have free stuff. I got this one of Ebob's website, where it is free to download. I printed it onto good quality white paper, using the printers maximum quality setting.
Step Two
I coated a sheet of mounting card with a thin layer of PVA Glue, and then stuck the roof picture to this.

I repeated the process with the wall sections, mounting them onto 5mm Foam Centered Card.
The sections were them allowed to dry under the weight of several big books to keep them flat. It takes about an hour.
Step Three
Then I cut out the wall sections and roof section with a craft knife. I used a new blade to keep the edges sharp. 
Step Four
I marked 5mm from the horizontal edge of the short wall sections. I carefully cut down through the card and foam, but not cutting all the way through. I removed the 5mm strip and discard. 
This will allow the pictures to but up together and not leave any white bits of foam or card showing. 
Step Five
I scored down the center of the mounting card roof section, removing a thin slither of card without cutting all the way through. This will allow the roof to bend to form an apex.
Step Six
I assembled the wall sections, gluing them to the mounting card base and to each other with PVA glue. 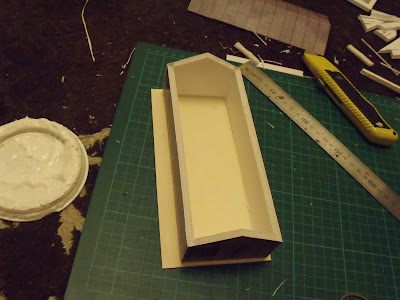
Next I glued on the roof and secure it with elastic bands. Take care not to put too much tension on the bands as it will warp the model. It takes about an hour to dry. 
The End Product
This is an army barracks. It took about 15 minutes to make, not including drying time. I can see it being useful as a VBCW Army or BUF base, or perhaps as a farm out building or workshop. The cost was probably no more than 30p. There we go: Cheap, good-looking and quick (just like me!).
You can't say fairer than that.
2 comments:
looks really good. Thanks for posting the link and the build article
Cheers
paul
Paper craft buildings will never look as good as scratch built pieces - but who has time to scratch build every structure they might want on their table? And there are a lot of high quality printable paper terrain pieces available on the web for for free or at lest cheap.
A while ago I bought my brother some (15mm) paper scenery where the bombed-out version of every structure nested inside the whole version. Kind of a neat idea that allowed "destructible terrain" for the table. Alas, I can't remember the site :P
Post a Comment